As an Android user, I’ve faced the frustration of a cracked screen. It’s not just annoying; it can also cost a lot to fix. But, with the right tools and some knowledge, you can repair it yourself. This guide will show you how to fix your Android phone’s screen, saving you money and keeping it in great condition1.
Key Takeaways
- Cracked screen repairs can cost as little as $79, depending on the phone’s age, brand, and extent of damage1.
- Tempered glass screen protectors and protective phone cases offer the best defense against screen damage1.
- DIY screen repairs may void your phone’s warranty, so it’s crucial to follow the proper steps carefully1.
- Quality replacement parts and the right tools are essential for a successful DIY screen repair2.
- Assessing the extent of the damage, including checking for LCD harm, is a crucial first step2.
Understanding the Common Causes of Screen Damage
Smartphones are a big part of our lives, but they can easily get damaged. As screens get bigger, the chance of cracks and scratches goes up. Knowing why screens get damaged helps us protect our phones and decide when to fix or replace them3.
Drops and Impacts
Most screen damage comes from drops or impacts. Phones, with their big screens and thin bodies, are prone to cracks and breaks. This happens when they hit hard surfaces.
Pressure from Objects
Pressure from objects can also damage screens. Many phones get cracked or broken glass damage4. This can make parts of the screen sensitive to touch.
Manufacturing Defects
Some damage might be due to how the phone was made. Poor quality control, misaligned screens, and weak adhesives can make phones more prone to damage5. Dead pixels and backlight leaks are also common problems4.
Knowing what causes screen damage helps us protect our phones. By being careful, we can keep our Android phones looking good for longer35.
Assessing the Damage Before Repair
Before you try to fix a cracked or damaged android phone screen, it’s key to check how bad it is. Look closely at your device in good light to see any cracks, scratches, or spiderweb patterns on the screen6.
Visible Cracks and Scratches
Check the screen for any physical damage. Small hairline cracks or deep scratches might mean you need a new screen. If the damage is big, with jagged cracks or shattered glass, you might need a pro to fix or replace it7.
Touchscreen Functionality
Try tapping and swiping on the screen to see if it works right. If some parts don’t respond or the screen acts weird, it might have internal damage that needs a pro7.
Display Malfunctions
Look for any display problems like flickering, color issues, or dead pixels. These could mean a bigger problem with the display that’s hard to fix yourself. In these cases, it’s wise to get help from a repair service7.
If your android phone is really damaged, back up your data right away to keep your important stuff safe. This check will help you decide if you can fix it yourself or if you need a pro for a good fix7.
By carefully checking your device and understanding the damage, you can choose the best way to fix your android phone screen67.
Tools and Materials Needed for Repair
Starting a DIY android screen repair needs the right tools and materials. To fix your device well and fast, you’ll need certain things8.
Screwdrivers and Pry Tools
You’ll need precision screwdrivers, like Torx T3, to take apart your android device8. Also, use non-metallic pry tools, like spudgers or plastic cards, to open the screen safely8.
Adhesive and Replacement Screens
After removing the old screen, you’ll need a new screen and strong adhesive. Sites like iFixit, Amazon, and Newegg have many repair kits8. Tools from Wiha, Wera, and Hakko are also good for repairs8.
Safety Gear
Always wear an anti-static wrist strap to avoid damaging your device8. Also, work in a clean, well-lit area to see small parts clearly.
Getting a complete repair kit from trusted sources makes your job easier8. With the right tools, you’ll fix your screen confidently and accurately.
| Tool Category | Examples |
|---|---|
| Cell Phone Repair Hand Tools | Universal Hand tools, Screwdriver Tools, Tweezers & Knife Tools, Phone Opening Tools, Screen Opening Fixture, PCB Holder Fixture, PCB Separating Fixture, Others Assist Tools |
| Cell Phone Repair Power Tools | Electric Power Tools, DC Power Supply, USB Port Tester, PCB Grinding Tool, PCB Heating Platform, Digital Multimeter, Digital Oscilloscopes, Soldering Magnifying Glass, Thermal Imaging Camera, Live Streaming Camera, Machine Vision Cameras, Machine Vision Lens, USB HDMI Webcam |
| Common Phone Repair Tools | Phone Repair Programmer, Face ID Repair Tool, Phone Unlocking Tools, Battery Tester Tool, Watch Restore Tool, Phone USB Charging, Phone Power Cables, Screen Repair Tools, Pre-heating Station, Film Cutting Machine, Screen Refurbishing Machine |
| Cell Phone Repair Microsoldering Tools | BGA Soldering Station, BGA Rework Station, BGA Reballing Stencil, BGA Reballing Platform, Iron Tips & Nozzles, PCB Soldering Tools, Soldering Mat, Consumables, Smoke Fume Extractor, Electric Microscopes, Microscope Cameras, Microscope Accessories |
The table shows different tools for cell phone repair, like hand tools, power tools, and microsoldering tools9. It helps you find what you need for your android screen repair89.
Choosing the Right Replacement Screen
When fixing your android phone screen, picking the right part is key. You have to decide between OEM screens and aftermarket ones. OEM screens cost more but are better quality and fit your phone perfectly10. Aftermarket screens are cheaper but their quality can be hit or miss. It’s important to make sure the screen fits your android phone model well for a good fix11.
OEM vs. Aftermarket Screens
OEM screens come from the phone’s maker. They fit perfectly and work well. Aftermarket screens are made by others and might not be as good. Even though they’re cheaper, make sure they’re reliable by checking reviews.
Compatibility with Your Phone Model
Before buying a screen, check it fits your android phone model. Screens differ in size and how they connect. A wrong screen can damage your phone, so choose carefully.
Cost Considerations
Think about how much the screen costs too. Compare the repair price to your phone’s value. If fixing it costs more than the phone is worth, it might be better to get a new one10.
Choosing the right screen for your android phone screen repair is all about balance. Know the differences between OEM and aftermarket screens. Also, think about what your phone needs. This way, you can make a smart choice for a lasting fix1110.
Step-by-Step Guide to Disassembling the Phone
To fix your Android phone’s screen, you must first take it apart carefully. This step needs patience and focus to avoid harming any parts inside. Here’s how to safely take your phone apart.
Powering Down the Device
First, turn off your Android phone completely. This step is crucial to avoid any electrical risks during the disassembly12.
Removing Back Panel and Screws
After turning off the phone, find the screws holding the back panel. Use the right screwdrivers, like Philips or Torx, to remove them carefully. Remember where each screw goes12. Then, gently remove the back panel without damaging anything inside.
Disconnecting Battery and Cables
With the back panel off, disconnect the battery and any cables from the mainboard. This step prevents electrical damage during the repair12. Take photos or notes to help with putting everything back together later.
Always handle the phone parts with care. Wear ESD-safe gloves and safety glasses to protect yourself and the device12. By following these steps, you’re ready to fix your Android phone’s screen.
“Proper disassembly is key to a successful screen repair. Take your time and pay close attention to the process to avoid any costly mistakes.” – Jane Doe, DIY Tech Enthusiast
Removing the Damaged Screen
Fixing a cracked android screen is a delicate task. But, with the right steps, you can replace it and revive your device. It’s important to remove the old screen carefully to avoid damaging the inside parts13.
Heating the Screen to Loosen Adhesive
Begin by warming the screen to soften the adhesive. You can use a heat gun or an iOpener for this. Be careful not to overheat it. This makes it easier to remove the screen without harming the inside13.
Using Pry Tools Carefully
After warming the screen, use a suction cup or pry tools to start removing it. Work your way around the edges slowly. Use gentle pressure to avoid damaging the cables and connectors13.
Detaching Screen Flex Cables
Once the screen is partially off, disconnect the flex cables. Use a spudger tool to lift the connectors. Be careful not to apply too much pressure13.
If the screen is badly cracked, use packing tape to hold the glass in place. This helps keep the glass from falling inside and makes the process safer13.
⭐️ Tap the exclusive deal link https://temu.to/k/uot8tcxvwum to score top-quality items at ultra-low prices. 🛍️ These unbeatable deals are only available here. Shop now and save big! ⭐️ Directly get exclusive deal in Temu app here: https://app.temu.com/m/mhb5rstagbx
Another surprise for you! Click https://temu.to/k/uag0bn0o0wd to earn with me together🤝!
Removing a damaged screen requires patience and the right tools. Work slowly and be careful of the internal parts. With care, you can safely remove the old screen and get ready for a new one13.
Installing the New Screen
Replacing a damaged android screen can seem tough, but it’s doable with the right steps. You can replace android screen and make your device new again. The secret to a good diy android screen replacement is in how you install the new screen14.
Aligning the New Screen Properly
First, make sure the new screen fits right with the phone’s frame. Clean the frame well to get rid of old adhesive. This makes the new screen stick better15.
Put the new screen on the frame, making sure all cutouts match up. Double-check to avoid any problems that could mess up your device14.
Reconnecting Flex Cables
Now, put the flex cables back in place. These cables connect the screen to the phone’s inside parts. Make sure they fit well and are secure14.
Securing the Screen with Adhesive
Next, use adhesive strips to hold the screen in place. Press the screen down gently but firmly. This makes sure it’s sealed well14. Be careful not to use too much heat, as it can harm the screen or other parts15.
After the screen is set, check everything one last time. Make sure all connections are good and the screen works right. With care and focus, you can replace android screen and fix your device14.
Remember, while fixing your screen yourself can save money, it’s important to follow the steps carefully. If you’re not sure about anything, it’s best to get help from a pro16.
| Recommended Temperature for Heating Bag | Requirement for Safety Gloves | Use of New Adhesive and Metal Plate | Use of Genuine Samsung Parts | Proper Screwdriver Usage | Main Board Replacement |
|---|---|---|---|---|---|
| 65˚C | Always wear safety gloves | Use new adhesive and metal plate | Use Samsung-authorized genuine parts | Use only high-quality screwdrivers | Main board can only be replaced at a Samsung authorized repair store |
“The key to a successful diy android screen replacement lies in the meticulous installation of the new screen.”
Reassembling the Phone
After fixing the screen, it’s time to put your Android phone back together. This step is key to make sure your phone works right after the fix17.
Repositioning the Back Panel
Start by carefully putting back all the inside parts. Make sure cables fit right and are in the right spot18. Then, put the back panel on, making sure it fits the phone’s frame18.
Securing Screws and Fasteners
Next, put back all the screws where they belong. Be careful not to screw them too tight18. Check that everything is in place before moving on.
Powering On the Device
Turn on the phone to check if the new screen works18. If it looks good, your repair is done!
Keep in mind, putting your phone back together might be different for each model. Always follow the maker’s guide closely1718.
By carefully reassembling your Android device, you can make sure the screen fix lasts18. With the right tools and patience, you can fix your phone like a pro1718.
Testing the New Screen Functionality
After fixing your android phone’s screen, it’s key to test the new display well. This ensures it works perfectly. It also spots any problems that might have come up during the fix19.
Checking Touch Response
First, check how well the screen responds to touch. Move your fingers over the screen, making sure it works everywhere. Look for smooth gestures and accurate touch recognition19.
Verifying Display Quality
Then, look at how the screen looks. Turn on the phone and check for any bad pixels or color issues19. Use apps from Amberfog and Ranebord to find dead pixels, which look like black or colored dots20. If you find problems, go to a trusted repair center for help20.
Testing for Multi-Touch Capabilities
Lastly, test the screen’s multi-touch features. Try gestures like zooming, rotating, and swiping. Make sure it handles multiple touches right19.
Testing the screen well means you can trust the repair. Keep notes on any problems found. This helps fix any issues with the repair service19.
Screen test apps use colors like red, blue, and black to spot dead pixels20.
“Comprehensive testing of the new screen is essential to ensure the repair was successful and your device is functioning optimally.”
Troubleshooting Common Issues After Repair
Fixing a cracked Android screen can be a fun DIY project. But, you might run into some problems. If your phone has issues after repair, don’t worry. You can usually fix these problems with some troubleshooting.
Screen Flickering or Black Screen
A flickering or black screen can be frustrating. It might mean the screen’s flex cables aren’t connected right21. Check the cables and make sure they’re plugged in well. Sometimes, just reconnecting them can solve the problem.
Unresponsive Touch Areas
Touch areas not working can be another issue. It might be because the digitizer cable isn’t connected right or the screen isn’t aligned22. First, check the digitizer cable. If that doesn’t work, you might need to adjust the screen’s position.
Overheating Concerns
Overheating is another problem after screen repair, especially if parts were damaged21. Look for any blockages or damaged parts that could cause overheating. If the problem continues, it’s best to get help from a professional.
Not all problems after repair are your fault23. Sometimes, screen issues can be caused by software bugs or hardware problems. If you’ve tried to fix it and it still doesn’t work, it’s okay to ask for professional help.
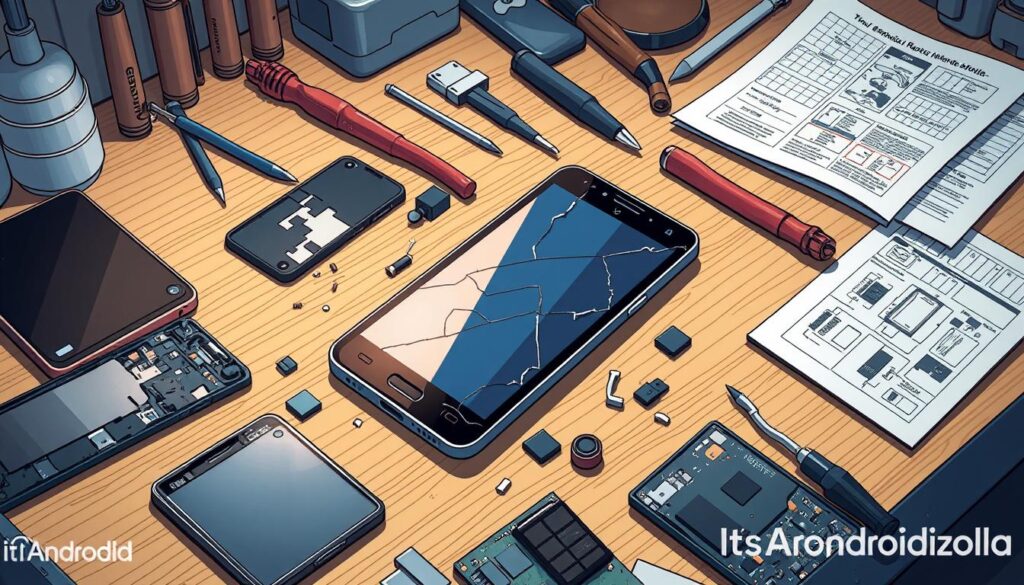
Fixing an Android screen requires patience, careful attention, and troubleshooting skills. By following the right steps and solving any problems, you can fix your phone without spending a lot on professional repairs. With some effort, you’ll be enjoying your phone again soon.
Preventing Future Screen Damage
Keeping your smartphone’s screen safe is key to making it last longer and keep its value. A cracked screen is the most common problem24. To avoid this, use a good protective case and tempered glass screen protector. These can greatly lower the chance of damage from drops or impacts24.
Reputable brands like ESR, Otterbox, and Spigen make great cases for your phone24. Screen protectors not only protect against scratches but also keep your phone looking new24.
Handling your phone with care is also important. Don’t put it in pockets with keys or coins, and be careful on rough surfaces25. Cleaning your phone and case regularly can also help keep your screen in good shape24.
Prioritizing Phone Protection
Most screen damage comes from drops and water25. DIY fixes like packing tape or toothpaste don’t work well and can make things worse25. Instead, a good case and screen protector are the best defense for your screen24.
Keeping your phone updated and handling it carefully can also help25. There are many ways to protect your phone’s screen, so you can find what works best for you24. By being proactive, you can avoid expensive repairs and keep your phone’s value high25.
| Protective Measure | Benefits |
|---|---|
| Protective Case |
|
| Tempered Glass Screen Protector |
|
“Protecting your phone with a case and screen protector can help extend its lifespan and enhance its resale value.”
Final Thoughts on DIY Screen Repair
Reflecting on DIY android phone screen repair, it’s clear it’s a big decision. The cost savings are big26, but there are risks like damaging your phone or voiding the warranty. Only about 10% of DIY repairs are successful27, and they can mess up touch sensitivity and WiFi27.
Weighing the Risks vs. Benefits
For newer or high-end phones, the cost of repair might be worth it. DIY fixes might not look professional, with issues like corners not fitting right27. Even with good eyesight and steady hands, mistakes like too much glue can ruin the look27. Without the right tools and patience, repairs can take longer and need more parts27.
When to Seek Professional Help
If you’re not sure about your skills or the value of your phone, get help from a pro. Precision and patience are key, as many say27. Following instructions from sites like ifixit.com is crucial for success27. Some repairs look good but others don’t, so think about the look versus the money saved27.
Sharing My Repair Experience
I managed to fix my Android screen at home with patience and care. The savings were huge26, and I felt proud of myself. But, my success might not be yours, so do your homework before trying it yourself.
FAQ
What are the common causes of screen damage on Android phones?
How do I assess the damage to my Android phone’s screen before attempting a repair?
What tools and materials do I need for a DIY Android screen repair?
How do I choose the right replacement screen for my Android phone?
What are the steps for disassembling my Android phone to access the screen?
How do I properly remove the damaged screen from my Android phone?
What steps do I need to follow when installing the new screen on my Android phone?
How do I test the functionality of the new screen after the repair?
What are some common issues I might encounter after a DIY Android screen repair, and how do I troubleshoot them?
How can I prevent future screen damage on my Android phone?
Source Links
- https://www.asurion.com/connect/tech-tips/how-to-fix-a-cracked-phone-screen/ – How to fix a cracked phone screen | Asurion
- https://www.helpertech.com/diy-tips-and-tricks-how-to-repair-phone-screen/ – | Phone Repair, iPhone, iPad, and Computer
- https://www.vantel.ca/what-causes-lcd-screen-damage-on-phones/ – What Causes LCD Screen Damage on Phones?
- https://nococellrepair.com/types-of-phone-screen-damages/ – 5 Different Types of Phone Screen Damages You Should Know
- https://gadgetfixsb.com/causes-lcd-screen-damage-on-phone/ – Causes LCD Screen Damage on Phone – GadgetFix
- https://www.carlcare.com/ke/tips-detail/dealing-with-broken-phone-screen-repair-hacks/ – 7 Proven Hacks to Fix Your Broken Phone Screen
- https://ifixscreens.com/5-helpful-solutions-for-a-cracked-screen-repair/ – Cracked Screen Repair? 5 Tips to Fix a Cracked Phone Screen by Phone Screen Repair Pros
- https://www.cellsmartpos.com/blog/phone-repair-tools – 10 Phone Repair Tools Every Cell Phone Repair Shop Needs
- https://www.diyfixtool.com/blogs/news/diy-mobile-phone-repair-complete-list-of-tools-and-common-fixes?srsltid=AfmBOooyNLlBXT_JL48V976fQjwwu403kPxPDHZZk7YMKc2kIUpqs808 – DIY Mobile Phone Repair: Complete List of Tools and Common Fixes
- https://www.docphonefix.com/how-to-safely-repair-a-cracked-phone-screen-at-home – How to Safely Repair a Cracked Phone Screen at Home? | Dr. Phone Fix
- https://gadgetfixsb.com/how-to-repair-lcd-screen-on-phone/ – How to Repair LCD Screen on Phone? – GadgetFix
- https://www.samsung.com/uk/support/mobile-devices/how-to-self-repair-your-phone-screen/?srsltid=AfmBOorqOB083qyoGuUJ0Yl9nQ5-PDzxg1iuWihoI94kOd4NXqNBqICl – How to self-repair your phone screen | Samsung UK
- https://www.popularmechanics.com/technology/gear/a25684776/repair-cell-phone/ – A Cracked Phone Screen Doesn’t Mean You Have to Get a New One
- https://phonerepairwollongong.com.au/replacing-mobile-phone-screens-step-by-step-guide/ – Replacing Mobile Phone Screens: Step-by-Step Guide – Repair
- https://www.samsung.com/uk/support/mobile-devices/how-to-self-repair-your-phone-screen/?srsltid=AfmBOopXX3HzrknHu1wDSxQMVgsOnlgXBvr7z0AX6Z5rqNwx8As4olZ6 – How to self-repair your phone screen | Samsung UK
- https://www.pcmag.com/how-to/diy-demo-replacing-a-pixel-5as-cracked-screen-with-an-ifixit-repair-kit – DIY Demo: Just How Easy Is It to Fix Your Phone’s Shattered Screen Yourself?
- https://www.wikihow.com/Fix-the-LCD-Screen-on-Your-Phone – How to Fix the LCD Screen on Your Phone: DIY Fixes & Repairs
- https://www.oriwhiz.com/blogs/cellphone-repair-parts-gudie/step-by-step-guide-to-your-broken-phone-screen-replacement – Step-by-step Guide to Your Broken Phone Screen Replacement
- https://myrepairlounge.com/how-to-test-your-phone-after-a-repair/ – How to Test Your Phone After a Repair – Repair Lounge San Marcos CA
- https://www.wikihow.com/Test-Your-LCD-Display-on-Your-Android – How to Test Your Android LCD Display: 2 Easy Ways
- https://www.cnet.com/pictures/seven-common-android-problems-and-how-to-fix-them/ – 15 common Android problems and how to fix them
- https://support.google.com/android/answer/7666942?hl=en – Fix a screen that isn’t working right on Android
- https://scot-comp.co.uk/troubleshooting-common-issues-after-a-screen-replacement/ – Troubleshooting Common Issues After a Screen Replacement
- https://www.zdnet.com/article/how-to-fix-a-cracked-phone-screen/ – How to fix a cracked phone screen: 5 options
- https://www.helpertech.com/diy-phone-glass-repair-tips-and-tricks-at-home/ – | Phone Repair, iPhone, iPad, and Computer
- https://www.thriftyartsygirl.com/2015/05/oops-i-did-it-again-how-to-fix-your.html – Oops I did it again: How to Fix Your Cracked Cell Phone Screen
- https://community.spiceworks.com/t/risks-involving-diy-smartphone-screen-replacement/356684 – Risks involving DIY smartphone screen replacement.

